Did you know that 50% of outdoor water used through lawn sprinkler systems goes to waste due to evaporation, wind, or runoff?
In fact, a healthy lawn only needs one inch of water per week, which takes about 15 minutes with an efficient system. However, when sprinkler heads get buried under dirt or wear down after 3-5 years, this efficiency drops significantly. That’s why regular irrigation repair and maintenance matters more than we think.
Many homeowners in California face common issues. These include uneven watering, dry patches, and water pooling around sprinkler heads. While minor repairs might cost between $75 and $250, letting these issues go unchecked can lead to extensive repairs costing $600 or more.
In this guide, we’ll walk you through how to identify and fix the most common irrigation system problems during the California summer. Let’s help you save water, money, and your lawn.
Identifying Water Pressure Problems
Water pressure issues can make a good irrigation system waste water. Pressure issues often go unnoticed until plants start showing signs of stress. Understanding how to identify these problems will help you maintain your system and save water. Let me show you how to spot pressure issues before they cause extensive damage to your yard.
Low Pressure Signs and Causes
Sprinkler heads that fail to pop up completely point to low water pressure in your system. You might notice uneven coverage with dry patches forming in areas that receive insufficient water. In some cases, donut-shaped zones of brown grass appear around sprinkler heads. The spray pattern looks weak and water fails to reach adjacent heads, forcing you to run your system longer to compensate.
Several factors can cause low pressure problems in your irrigation system. Valves that aren’t fully open on your backflow preventer can limit water flow. This happens even when the pressure inside your home is normal. Underground leaks or breaks in water lines often show as unusually wet areas or random depressions in soil. Clogged filters or dirty sprinkler heads can block water flow. This usually impacts some heads while others function well. Tree roots can infiltrate water lines over time, wrapping around or piercing pipes and reducing pressure.
High Pressure Issues
Misting from sprinkler heads shows that the water pressure is too high. This fine mist gets blown away by the wind. It evaporates before it can reach your landscape. This wastes water and lowers irrigation efficiency. High pressure can harm system parts. This is especially true at PVC pipe joints where fittings meet. A pressure reading above 80 psi puts your entire irrigation system at risk.
The effects of high pressure extend beyond visible misting problems. Pressure has a direct impact on flow – a 20% pressure change creates approximately 10% flow variation. Systems with lower design pressure have more problems when pressure changes from normal levels. Elevation differences, zones cycling on and off, and shifts in water sources all cause pressure changes in your system. Testing with a pressure gage reveals if you fall outside the ideal range of 45-80 psi.
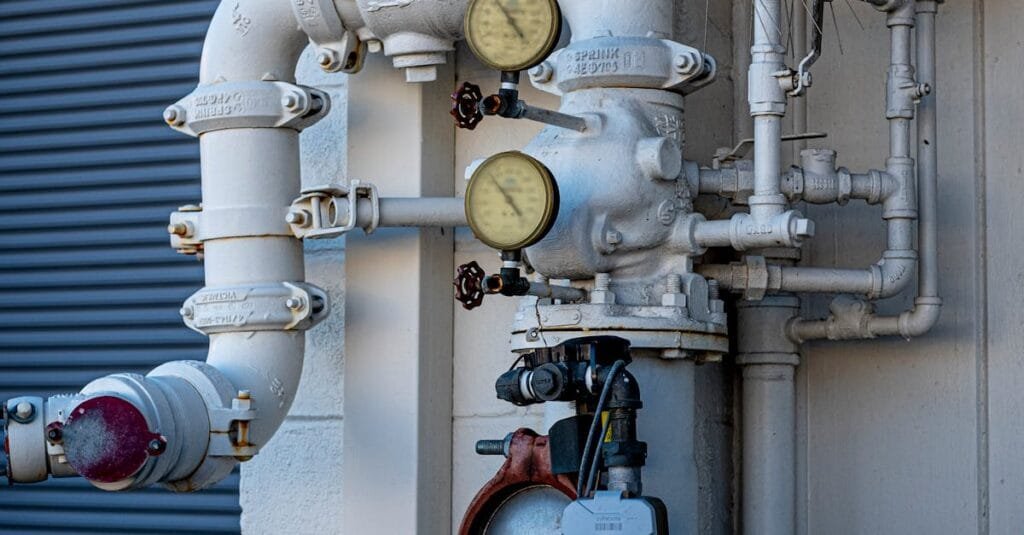
Fixing Pressure Regulators
Pressure regulators are key parts that help your irrigation system run smoothly. These devices manage high inlet pressure. They also keep outlet pressure steady for your sprinklers. Without proper regulation, sprinkler performance drops. The throw radius changes, and fittings can blow out of the tubing. Regulators should be checked every three years. This is important for systems that run many hours each season.
Installing pressure regulators correctly makes all the difference in their effectiveness. Always put them downstream from shut-off valves. Follow the directional arrow to ensure correct flow direction. For testing regulators, install pressure gauges on both sides. One gauge measures the inlet pressure above the regulator. The other checks the outlet pressure below it. If a regulator delivers outlet pressure significantly above its rating, replace it immediately.
When to Call for Irrigation Service and Repair
Contact professionals if your pressure measures below 25 psi or above 125 psi after basic troubleshooting. Major leaks or pipe damage beneath your lawn require specialized tools and knowledge that go beyond typical DIY fixes. Electrical problems with solenoids, valves, or control panels can be dangerous. It’s best to let certified technicians handle them. Complex repairs like valve replacements need expertise to avoid creating additional problems.
Consider professional help when pressure problems persist despite your efforts to fix them. Multiple zones underperforming simultaneously indicates a system-wide issue requiring diagnostic equipment. If pressure changes during the day and neighbors have the same problem, there may be issues with the municipal water supply. Professional irrigation repair services can evaluate your system. They find lasting solutions that tackle the root causes, not just the symptoms.
Repairing Leaking Pipes and Fittings
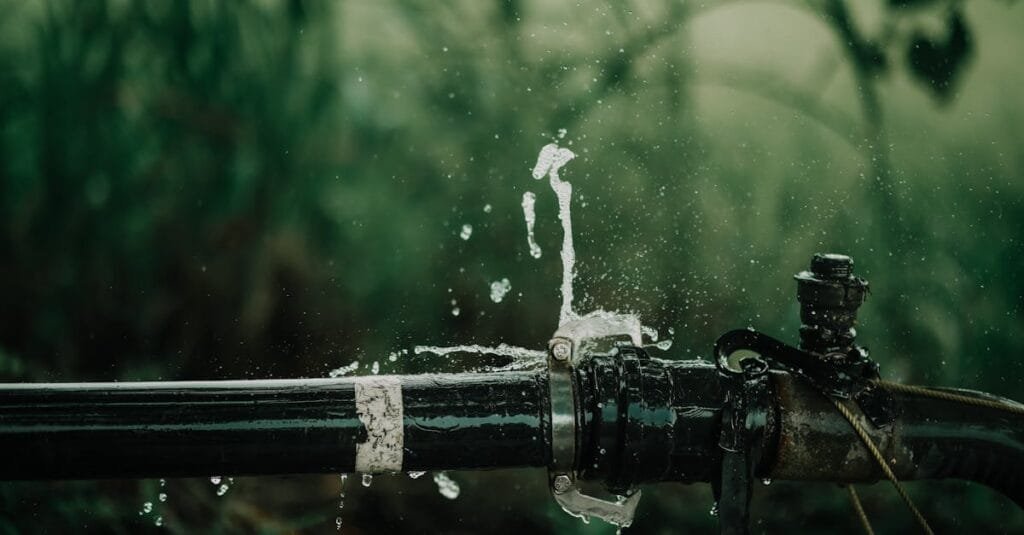
Leaking pipes waste thousands of gallons of water yearly and increase utility bills unnecessarily. Spotting and fixing these leaks early prevents landscape damage and saves money on water costs. Regular irrigation maintenance keeps your system running efficiently throughout the California summer. These steps will help you find and fix common pipe leaks. You won’t need to call a pro for every issue.
Finding Hidden Leaks
Hidden irrigation leaks often show themselves through subtle signs in your yard. Wet spots or areas that stay soggy long after watering cycles end point to underground pipe leaks. Taller or greener patches of grass show that those areas get extra water. This usually happens because of leaking pipes nearby. To check your water meter, first turn off all the water in your house. Then, look at the low flow indicator triangle. If it spins, you probably have a leak in your system. Check the spaces between underperforming sprinkler heads. Leaks often happen in these connecting lines.
Temporary Fixes for PVC Pipes
Temporary solutions buy time until permanent repairs can be made. Pipe repair clamps with rubber pads inside create quick seals against pipe material and only take minutes to secure. Epoxy putty works well for copper and galvanized steel pipes but should not be applied to plastic pipes like PVC or PEX. Tape solutions work best on dry pipes. Use duct tape for quick fixes. For threaded connections, use Teflon tape. For leaks where pipes meet fittings but aren’t fully cracked, you can use leak stopper rings. First, prime and glue the rings, then push them against the fitting. This will create a strong, permanent bond.
Replacing Damaged Sections
Permanent repairs require cutting out damaged pipe sections and replacing them properly. First, shut off the irrigation system at the main control valve to stop water flow completely. Next, dig around the leaking area to expose the pipe plus six inches on each side for working room. Cut out the damaged section using a PVC pipe cutter for clean edges, removing slightly more than the visibly damaged portion. Install the replacement using compression couplings or slip couplings that expand to fit the gap without additional parts. Test the repair by running the zone for several minutes before filling in soil to ensure no leaks remain at connection points.
Fixing Sprinkler Head Malfunctions
Sprinkler heads become the first casualty in most irrigation systems. Your watering system needs regular care. Components can get damaged by lawn mowers, clogged with dirt, or just wear out. A single malfunctioning head can waste up to 25,000 gallons of water in six months. Regular inspection and repair of these components forms the foundation of effective irrigation repair and maintenance.
Cleaning Clogged Nozzles
Dirt and debris build up inside sprinkler nozzles over time, blocking water flow and creating dry patches in your lawn. This problem occurs more frequently after winter when irrigation systems sit unused for months. Any homeowner with a screwdriver can clean clogged nozzles without professional help. First, lift the nozzle to its operating position and unscrew it from its sleeve completely. Next, soak the sprinkler head in a bucket of hot water to loosen accumulated debris. Meanwhile, clean any dirt from the sleeve itself to prevent recurring problems. After soaking, use a stiff wire to clear individual nozzle holes before reassembling everything. Test the system afterward to verify proper spray patterns.
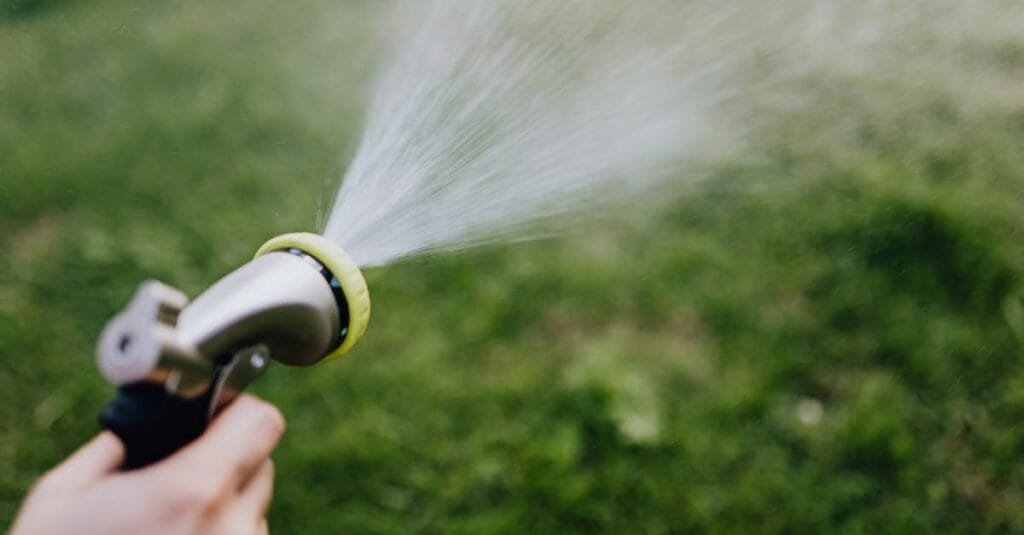
Adjusting Spray Patterns
Misaligned spray patterns waste water and lead to unhealthy brown patches in your yard. For most pop-up sprinklers, insert a flat-head screwdriver into the adjustment screw on top of the nozzle. Turn clockwise to decrease spray distance or counterclockwise to increase it. For adjusting the arc width on rotary heads, locate the pattern adjustment slot and insert a screwdriver. Turn the nozzle turret clockwise to widen the spray pattern. Turn it counterclockwise to narrow it. You can adjust the angle anywhere from 40° to 360°. Test your changes while the irrigation system runs. This way, you can check for proper coverage and overlap between nearby sprinkler heads.
Replacing Broken Heads
Broken sprinkler heads typically result from lawn mower damage, foot traffic, or normal wear after 15-20 years of service. Signs include water pooling around the base, geysers, or sections of lawn receiving no water. Replacing a head costs between $8 and $21 depending on type. Begin by digging around the broken head to expose the riser connection. Unscrew the damaged head counterclockwise and bring it to your local hardware store to find an exact match. Install the new head by wrapping threads with plumber’s tape and hand-tightening until secure. Backfill soil around the head. Make sure it is level with the ground. This helps it work well and protects it from damage.
Troubleshooting Controller and Electrical Issues
Electrical problems in irrigation systems often confuse homeowners yet represent common fixable issues. The controller is the brain of your irrigation system. It sends 24VAC signals to open valves and manage each zone. Knowing how to program controllers, test solenoids, and fix wiring issues keeps systems reliable during California summers. Even low-voltage systems require care when troubleshooting to avoid damage to components.
Resetting Programming
Many controller issues fix themselves with a quick reset. This often clears glitches and avoids the need for replacement. For Rain Bird ESP-Me controllers, turn the dial to Seasonal Adjust. Next, press both arrow buttons at the same time for three seconds. Wait until “CLEARED” shows up on the screen. To set up Hunter SRC controllers, first unplug the transformer and remove the battery. Then, hold down three buttons while reconnecting the power. Most modern controllers have a small reset button. You can find it by opening the controller face like a door. Sometimes, you need a paperclip or a similar tool to press it. After resetting, the controller goes back to factory settings. You will need to reprogram the schedules and run times.
Testing Solenoids and Valves
Solenoid testing requires a voltage measurement at both the controller and valve. Using a voltmeter set to AC voltage, touch one probe to the station terminal and the other to the common terminal while the station runs. Proper readings should show 24-28VAC at both the controller and valve. Solenoids that “buzz” often indicate inadequate voltage reaching the valve. To check if the solenoid works, unscrew it from the valve. Then, connect it straight to your controller or a valve activator tool. This tests it without using the field wiring. Normal solenoid resistance is between 20 and 60 ohms. If it’s much higher or lower, there may be issues.
Wiring Problems
Three primary wiring issues plague irrigation systems: shorts, breaks, and bad splices. Short circuits have low resistance readings, usually between 1 and 10 ohms. They often blow controller fuses when they happen. Broken wires show very high resistance or infinite readings on a multimeter. This stops all valves past the break point from working. Bad splices show higher resistance readings, often between 70 and 150 ohms. This allows some current to pass, but it’s not enough to operate valves correctly. For quick diagnostics, use a multimeter on the controller. Place one probe on the common terminal. Then, put the other probe on each zone terminal to check resistance. This way, you won’t have to dig. Check the wiring at the controller first. This saves time by finding problems before you search your yard.
Conclusion
Maintaining your irrigation system regularly saves water and money. It also helps avoid major damage to your California lawn. Small issues, such as pressure problems, leaking pipes, or broken sprinkler heads, can turn into big repairs if not fixed. These problems need quick identification and fixes to maintain system efficiency.
Many irrigation repairs require specific tools and knowledge beyond basic DIY skills. For sprinkler repair in California, call Irrigation Pros at 657-378-8918. Contact us for complex issues like electrical problems or underground pipe damage. Professional help ensures lasting solutions and prevents additional complications from incorrect repairs.
Water conservation starts with a well-maintained irrigation system.
To keep your system running well, you should:
- Test pressure levels
- Clean sprinkler heads
- Check for leaks
- Maintain controllers
Your lawn needs the right amount of water at the right time, which comes from a properly functioning irrigation system.
Proudly Serving California’s Beautiful Communities
We proudly offer sprinkler and irrigation services throughout Orange County and surrounding areas. Whether you need sprinkler repair, installation, or regular maintenance, our local team is just around the corner to help you improve your lawn. Explore our service areas below:
- Yorba Linda
- Villa Park
- Tustin
- Trabuco Canyon
- Seal Beach
- Santa Ana
- San Clemente
- Rancho Santa Margarita
- Aliso Viejo
- Orange
- Mission Viejo
- Lakewood
- Lake Forest
- Laguna Woods
- Laguna Niguel
- Laguna Beach
- Ladera Ranch
- La Mirada
- Irvine
- Huntington Beach
- Fullerton
- Fountain Valley
- Dana Point
- Cypress
- Coto de Caza
- Costa Mesa
- Cerritos
- Brea
- Anaheim Hills
- Newport Beach